

Quickstart
This guide takes you from a new account to your first captured email. It should take just a few minutes.
Create your account
Section titled “Create your account”Head to Create your account and sign up with your email or a social login. Your first organisation is created for you automatically — that is the account that owns your projects and team.
1. Create a project
Section titled “1. Create a project”Use the project selector in the header to create your first project. Give it a recognisable name — most agencies use one project per client.
2. Add an inbox
Section titled “2. Add an inbox”Inside the project, open “Inboxes” and click “New Inbox”. Name it after the environment you are testing, such as “Staging”. MailSandbox generates unique SMTP and API credentials for the inbox automatically.
3. Connect your app
Section titled “3. Connect your app”Open the inbox and click “Configuration”. Copy the connection settings for your stack — the screen includes ready-made snippets for Laravel, Node.js, Python, Ruby, WordPress and more, with your credentials already filled in.
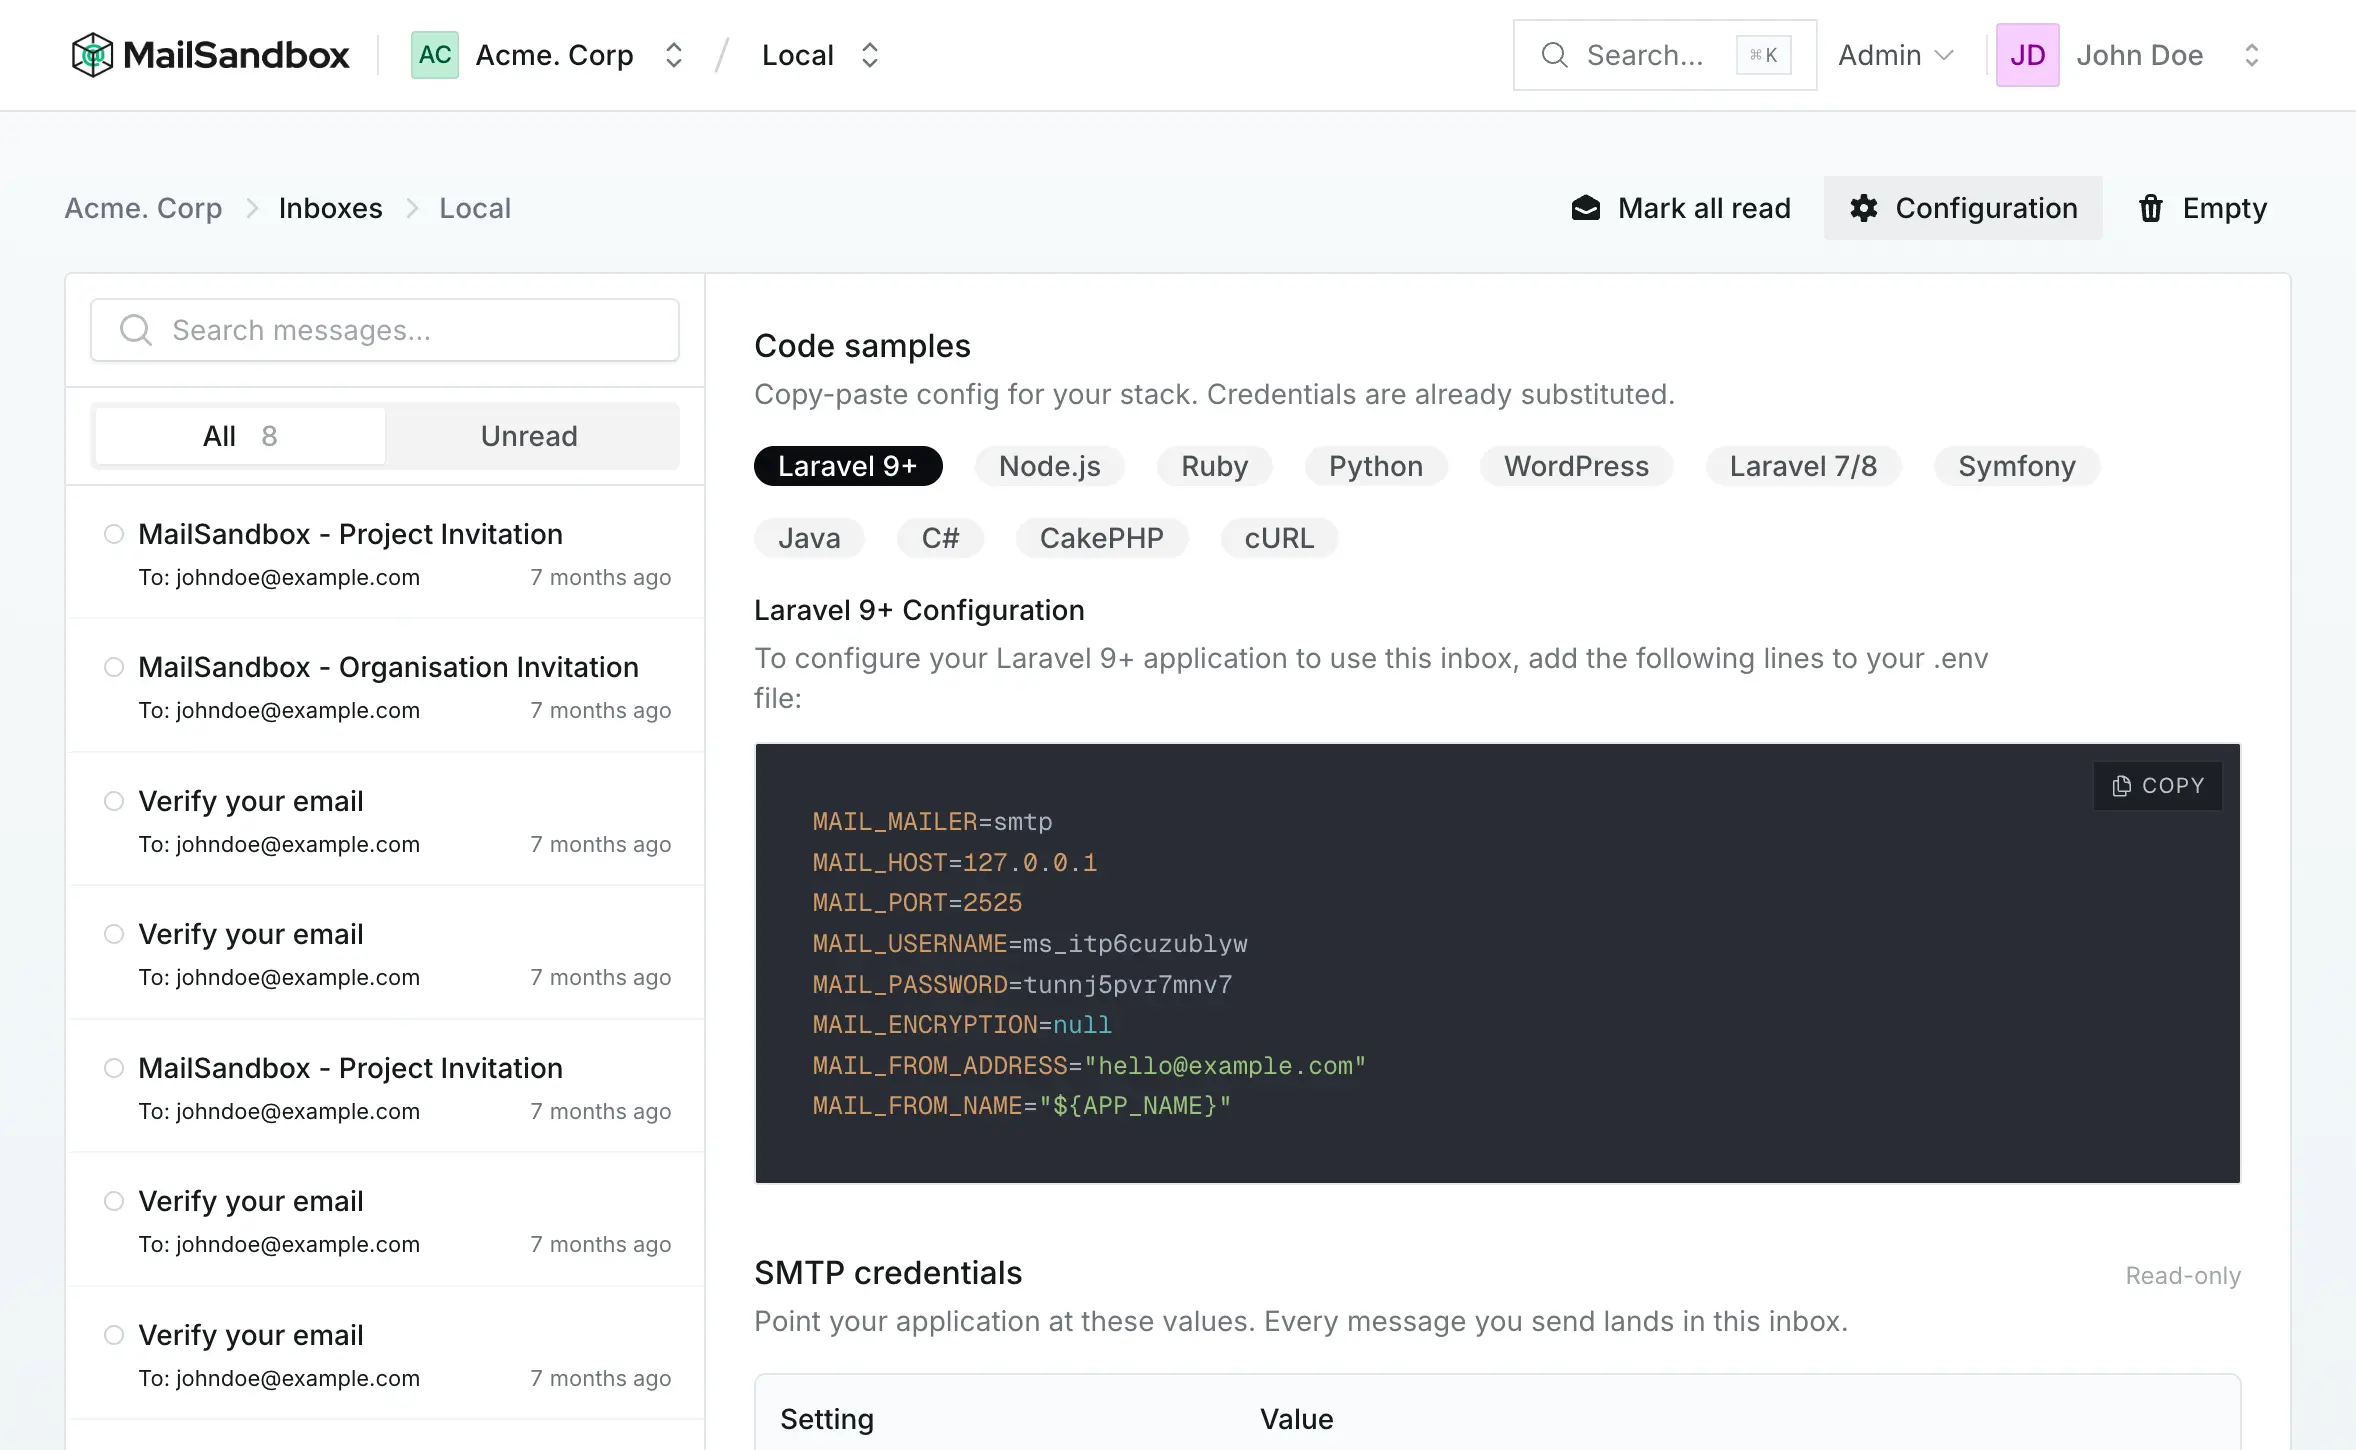
Choose the method that fits your app: SMTP, the API, or the WordPress plugin.
4. Send a test email
Section titled “4. Send a test email”Trigger any email from your application — a signup confirmation, a password reset, anything. Within moments it appears in the inbox instead of a real mailbox.
Open the message to preview how it renders, run the HTML compatibility and spam score checks, and share it with your client for approval.